How to add tags for Shopify Orders?
It is hard for your store to manage orders when your shop has a lot of orders. You take so much time for processing fulfillment and shipment. To help you with this problem, Shopify provides the tag feature. The feature will help you add tags for your orders classifying them, so it will help you to manage your orders better.
Below is a guideline that gives you a detailed guide on how to add order tags for Shopify Orders. Please spend your time reading this writing carefully and follow the instruction.
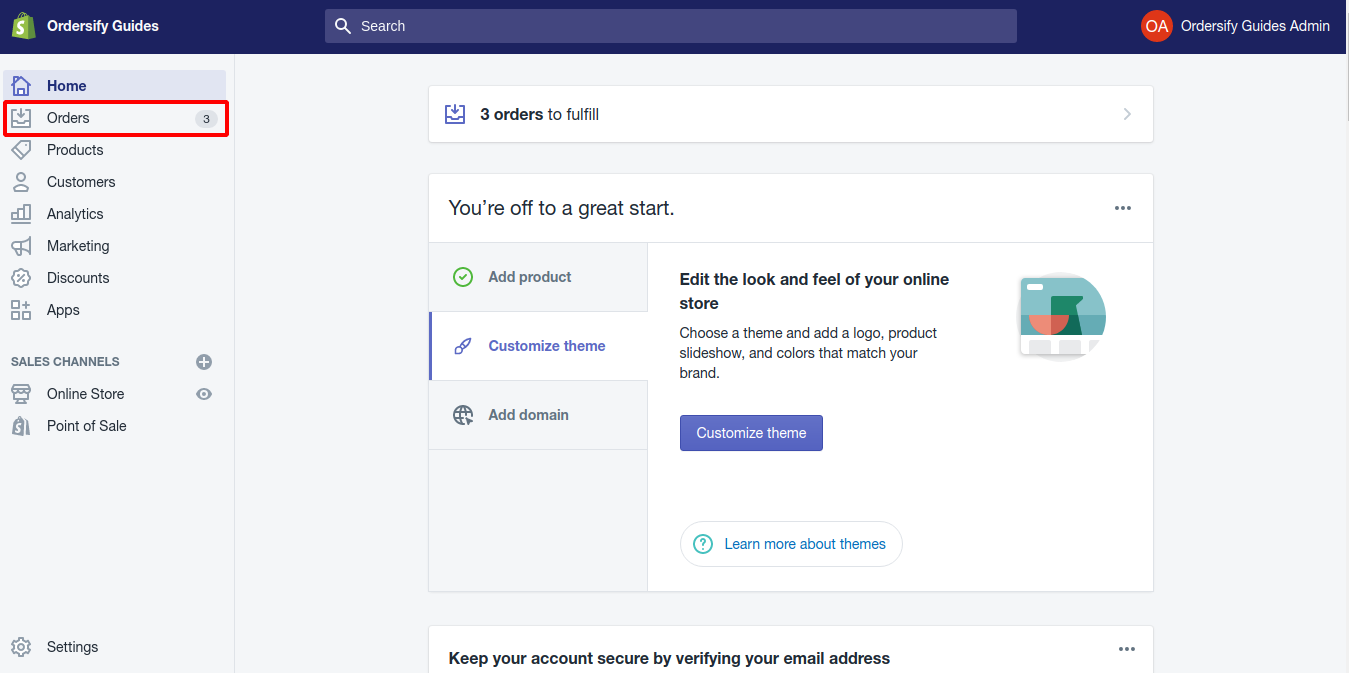
Step 1: Go to Orders.
After you get to the Shopify admin screen, look at the left-hand side of the page, there is a Orders button, click on that button to get to the Order page.
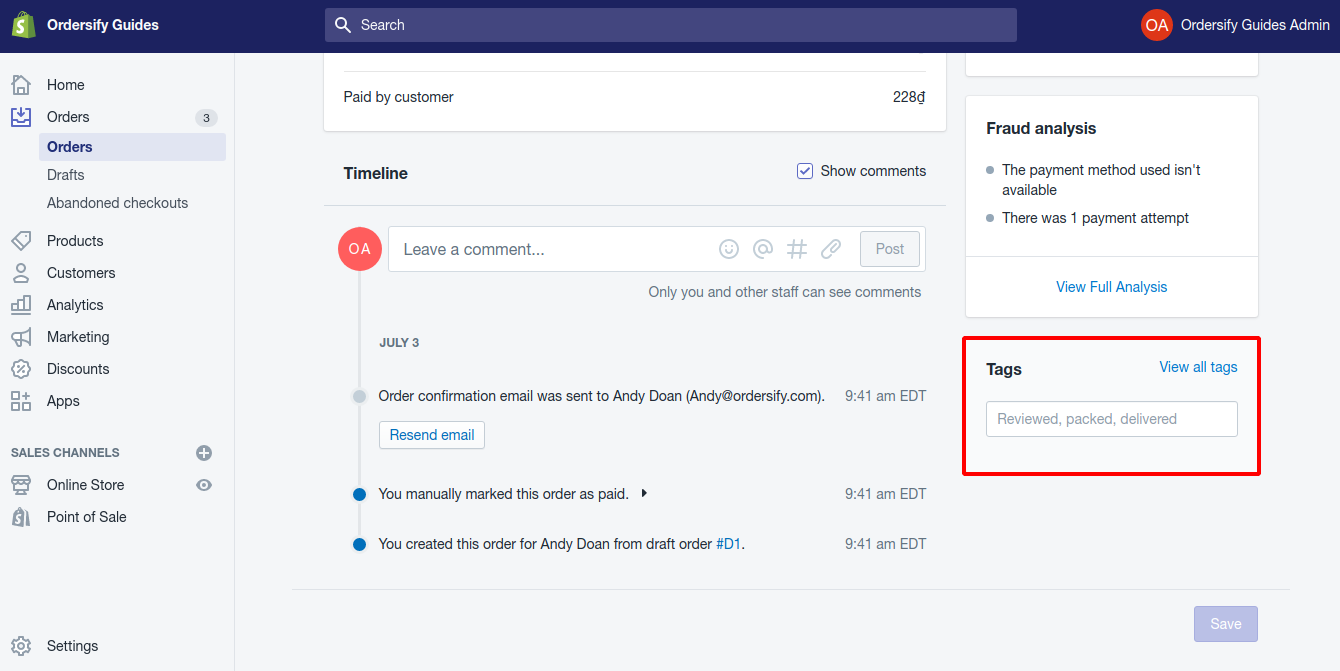
Step 2:Enter tag names
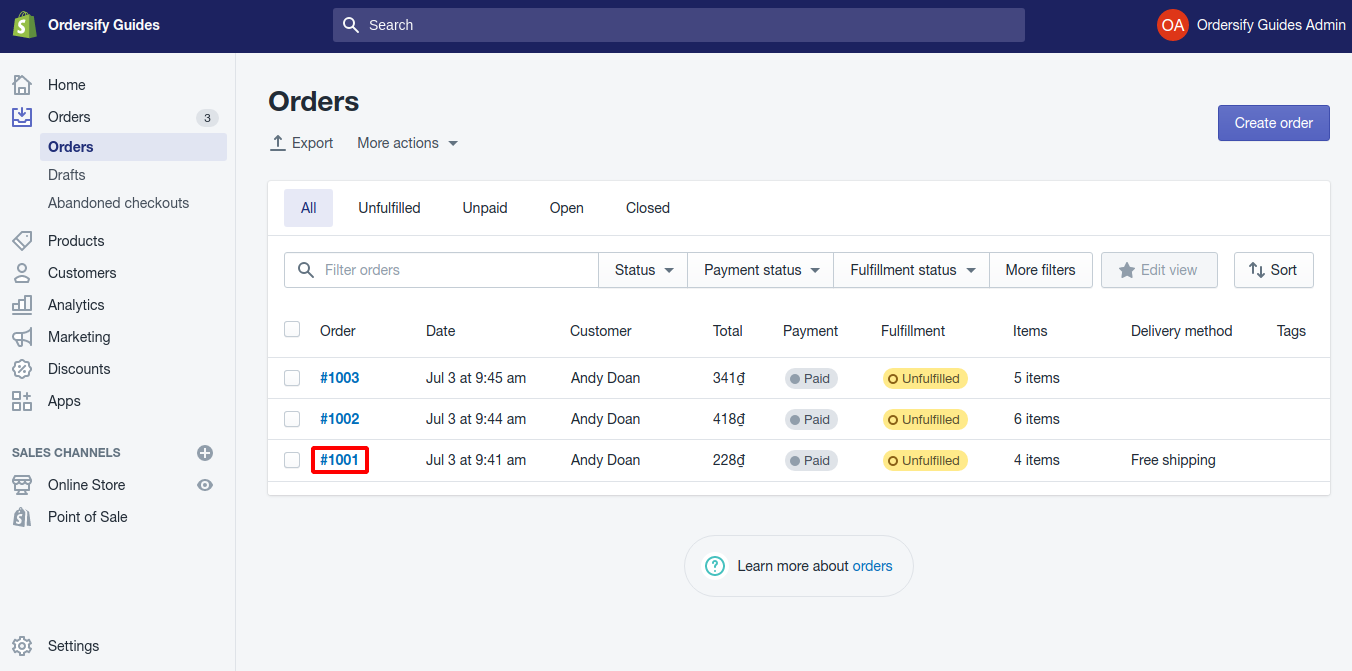
Inside the Orders page, you can choose an order from the orders list by clicking on the number of the order.
In the order details page, find the Tags section and enter its name. Each tag is separated by a comma. The limitation is 40 characters including numbers and letters.
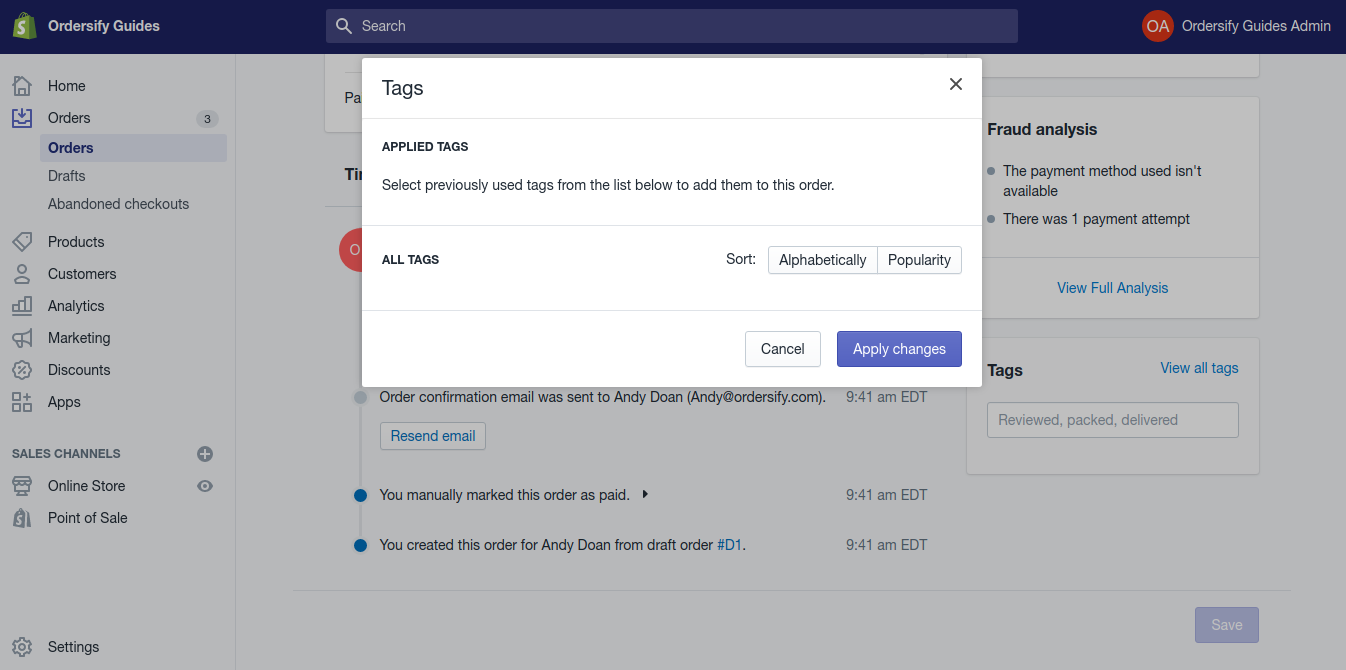
Step 3: Add a tag to your order.
Next, you can choose the previous tags by clicking on View all tags and choose the name you want to add. After you have finished adding tags, click on the Apply changes button to add those to the order or tap Cancel if you notice any mistakes.
Step 4: Saving.
Finally, click Save to finish.