A step by step drawing on an Image on Shopify
If you are planning to add a highlight part to the image, the option to draw on the image will be helpful. This is another option from the Files setting page for you to use in order to edit the image, other than croping, enhancing, resizing image, etc.
The writing below is an instruction on the topic A step by step drawing on an Image on Shopify. I hope you will read this writing carefully to apply it to your store.
Step 1: Choose product you want to draw image.
After signing in your account on Shopify, go to Products. Then choose product you want to draw image.

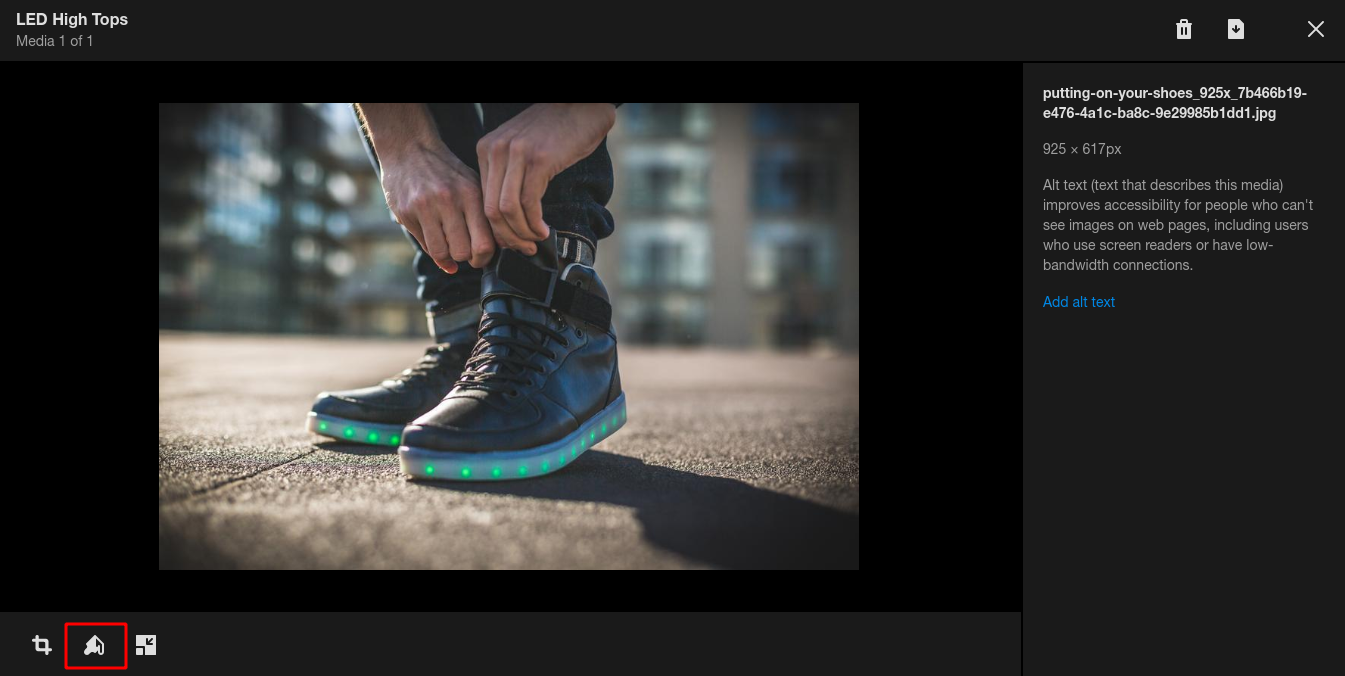
Step 2: Click Draw.
In the Media section, you can pick a photo and click on the Draw button in the bottom corner of the screen.
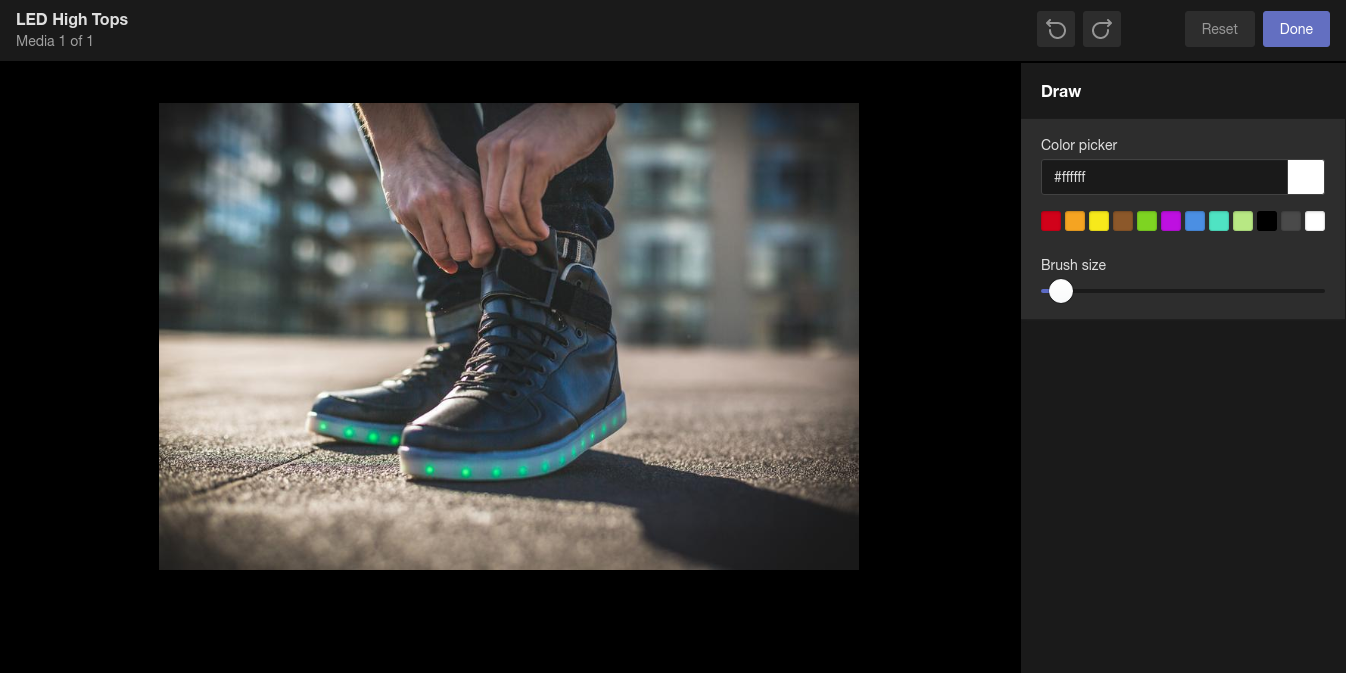
Step 3: Select the brush size and color.
You can choose the brush size suitable for your drawing from the Brush size section and choose its color by clicking on the Color Picker.
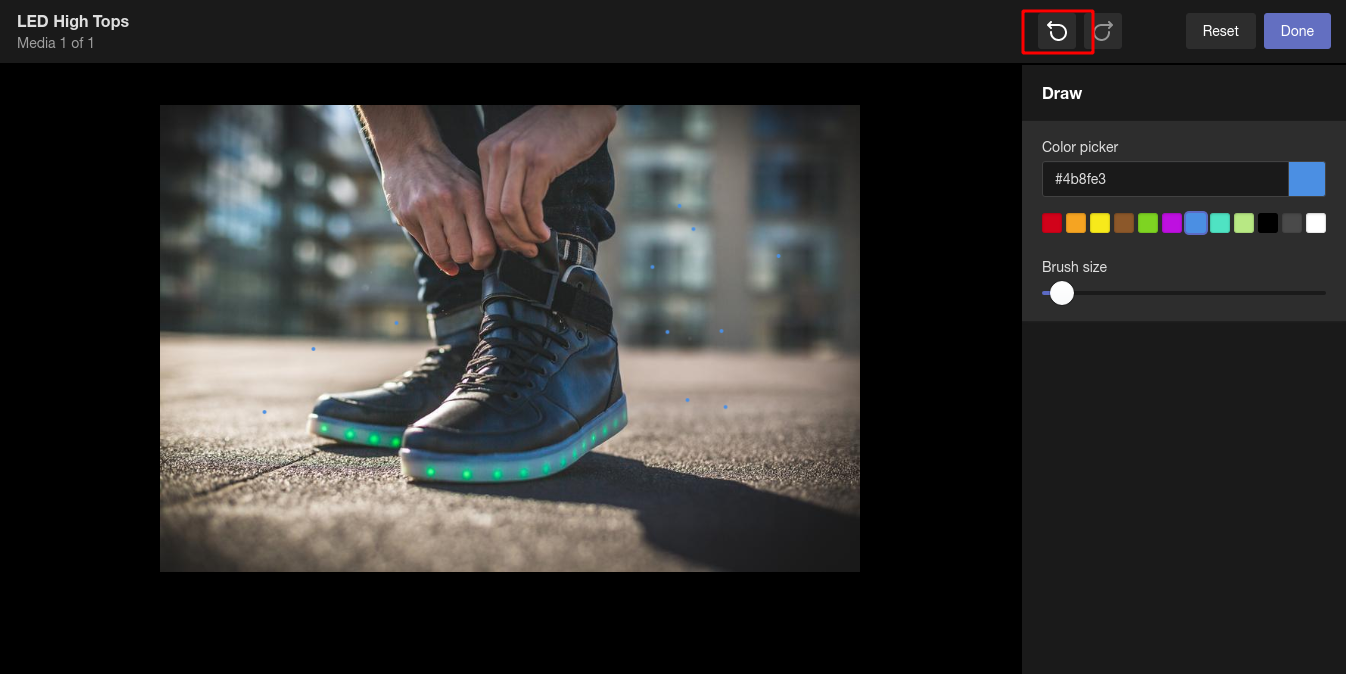
Step 4: Draw on the image.
Click the left mouse and drag it to the image to draw as you want. If you draw something unintentionally and want to remove it, click the arrow icon to delete the unwanted pattern.
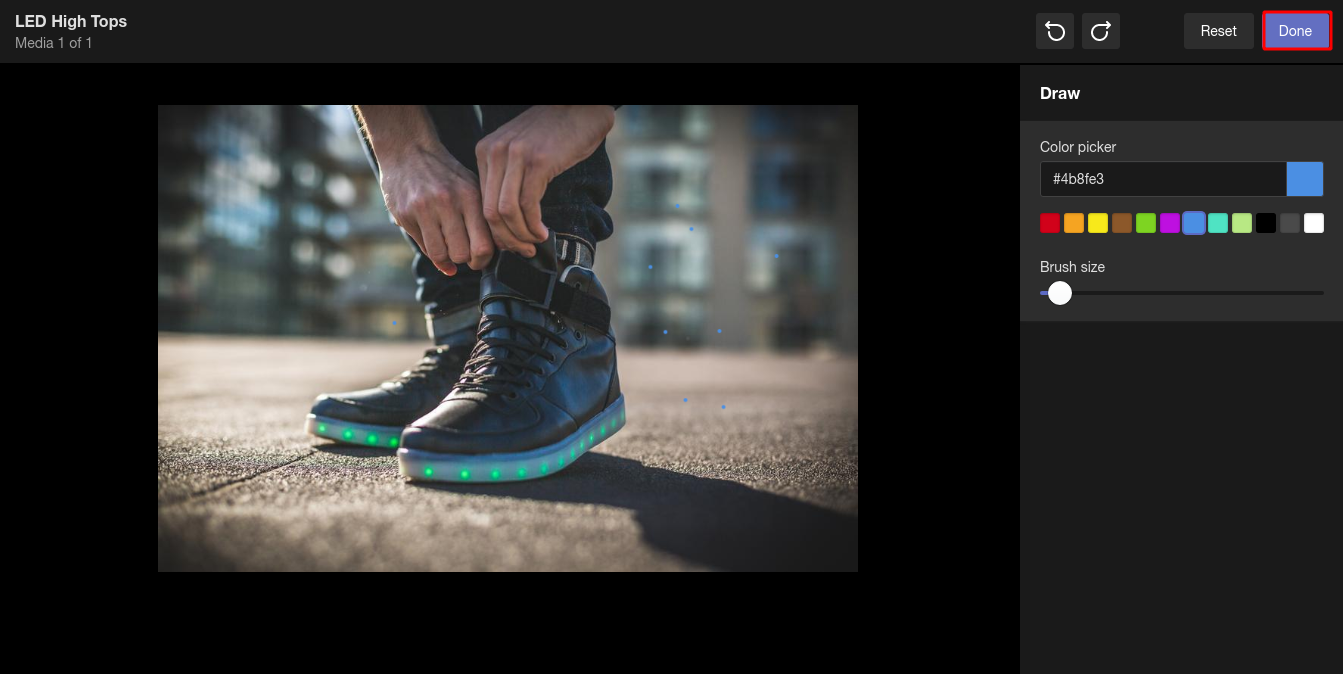
Step 5: Press on Done.
After finished drawing, press on Done to apply the adjusted color.
Step 6: Save.
Finally, click Save to apply the changes to your image.


