Add comments to Timeline on Shopify
As an e-commerce platform ideal, Shopify provides each user with a Timeline for the implementation of internal affairs. For example, you are able to take a view of histories in the Order’s Timeline and leave comments. Thanks to that, you can still know the information about your order or issues of the order without having to remember all of them. Moreover, your staff can know the comments that you have left so you do not need to speak directly with them.
And below are some simple steps that could help you to Add comments to Timeline on Shopify more easily and effectively.
Step 1: Select Orders, Customers or Products.
After logging in your Shopify account, select which parts you prefer to add comments such as Orders, Customers, or Products. Look at the left of the screen and select one of them.
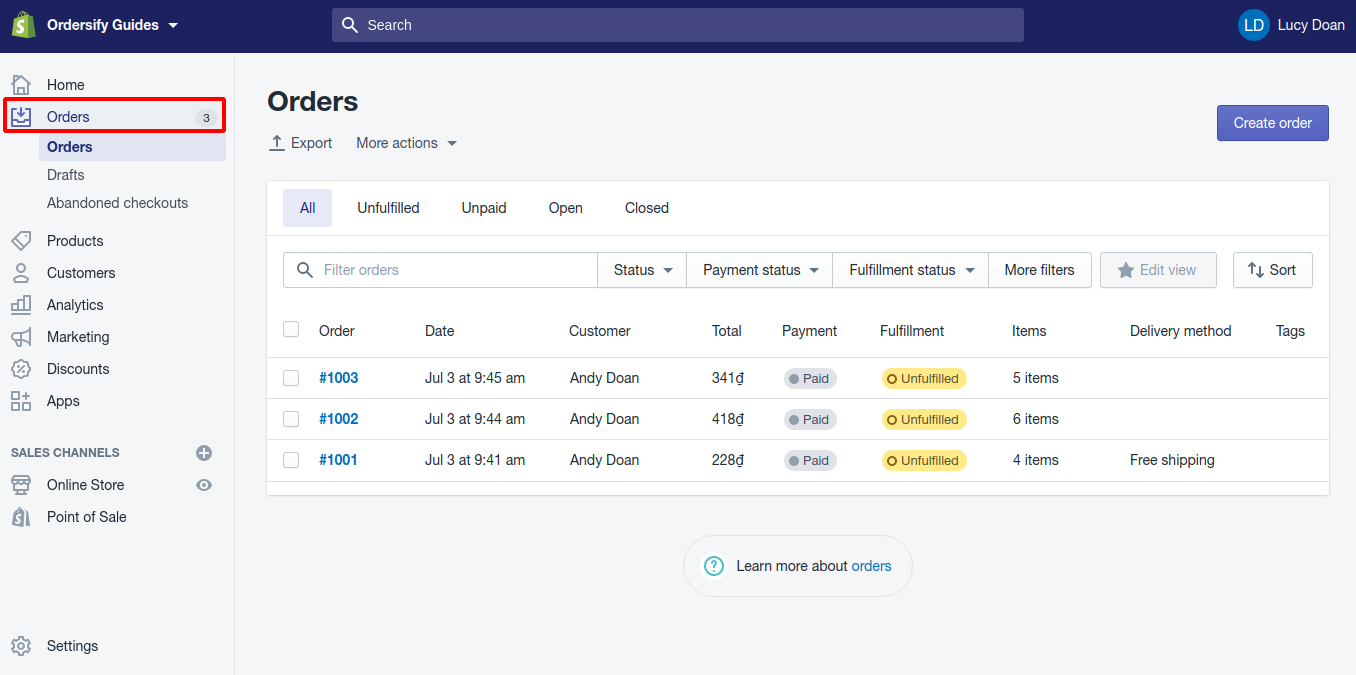
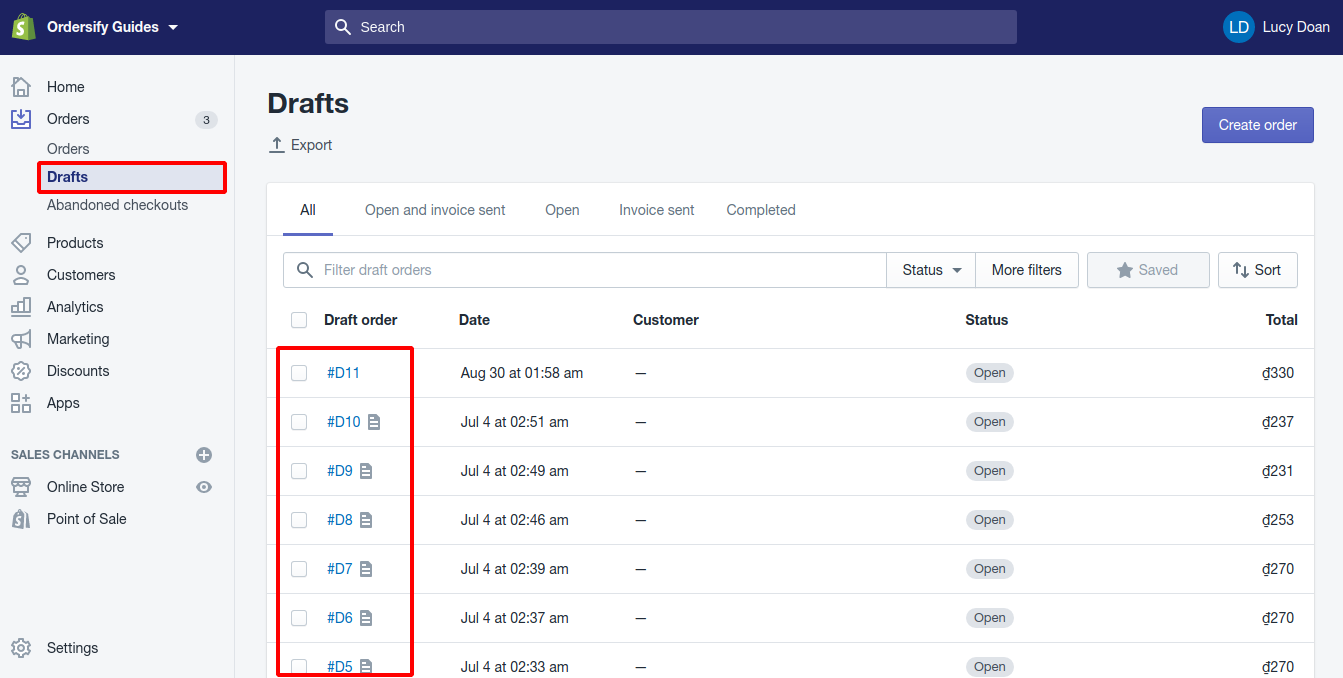
- To select Orders:
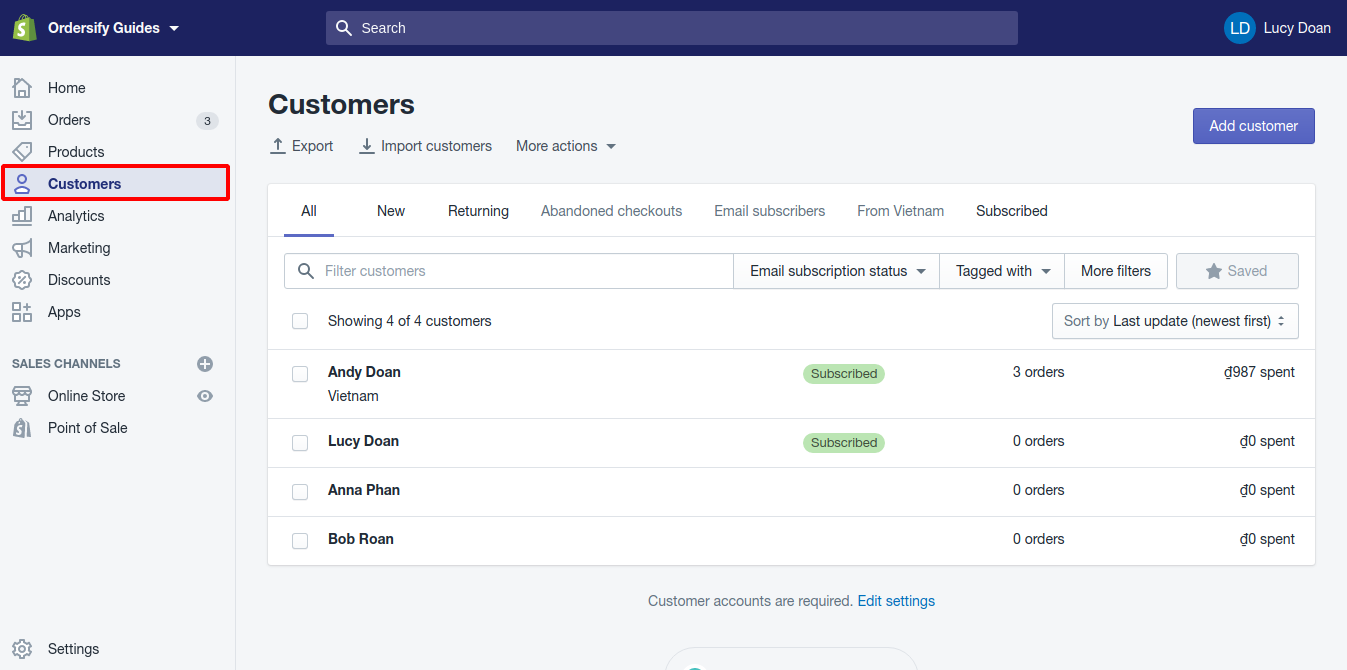
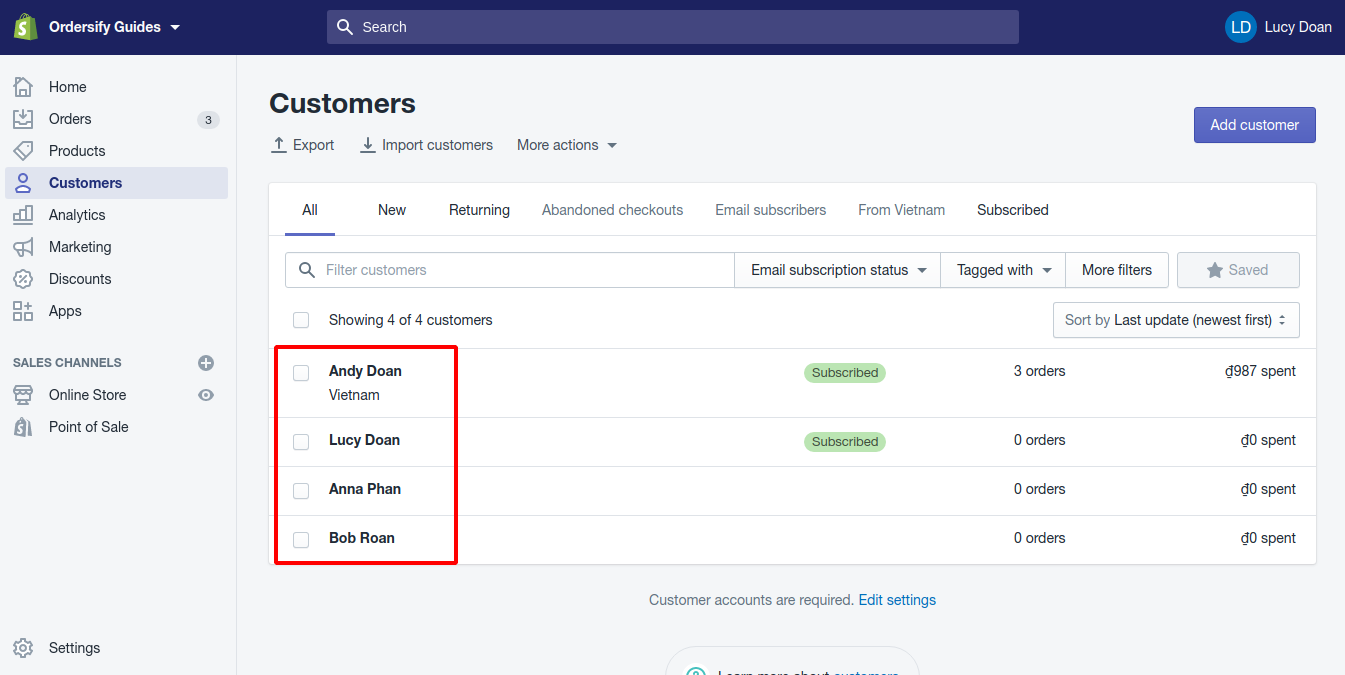
-To select Customers:
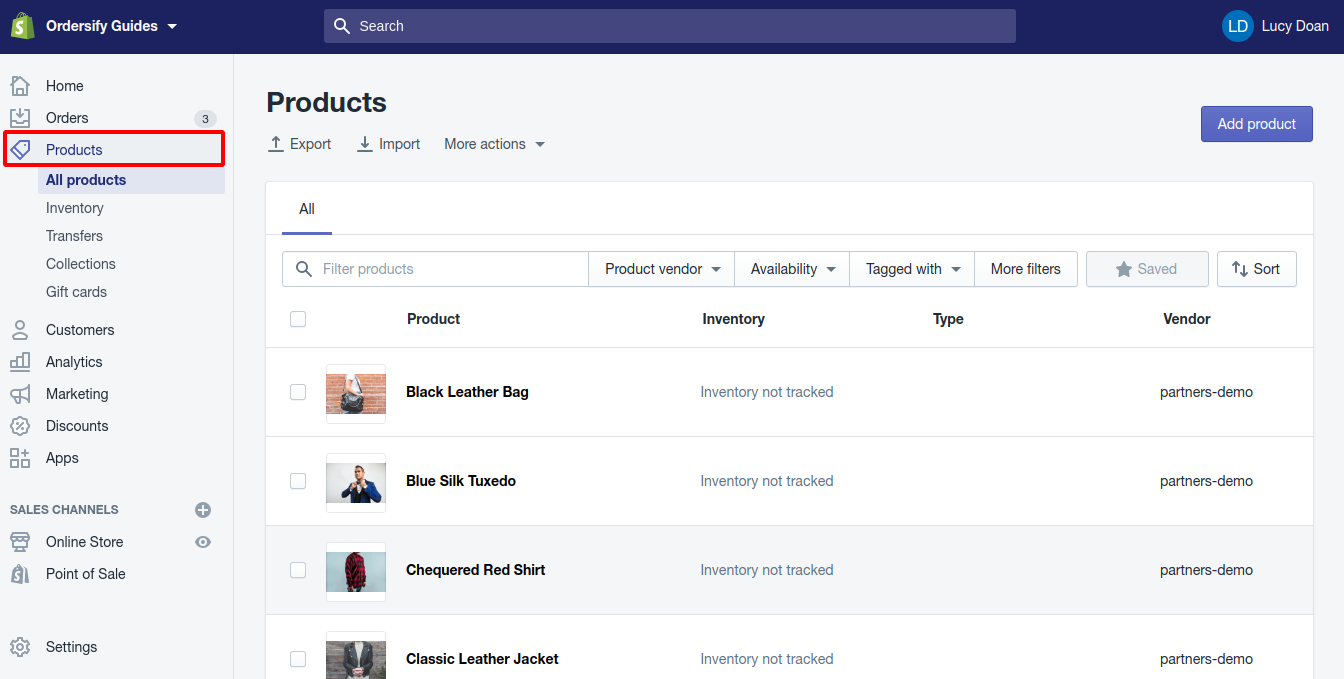
- To select Products:
Step 2: Choose the section to add comment.
-
If you’ve selected Orders, you can add the comments to your orders and draft orders. To comment on a specific order, click on the name of the order. Or else, press on Drafts to select the draft orders to add comments.
-
If you’ve selected Customers, choose the customer you expected by clicking on the name.
-
If you’ve selected Products, go to the Transfers section to view all the transfers you had. Then, choose one of them to add a comment.

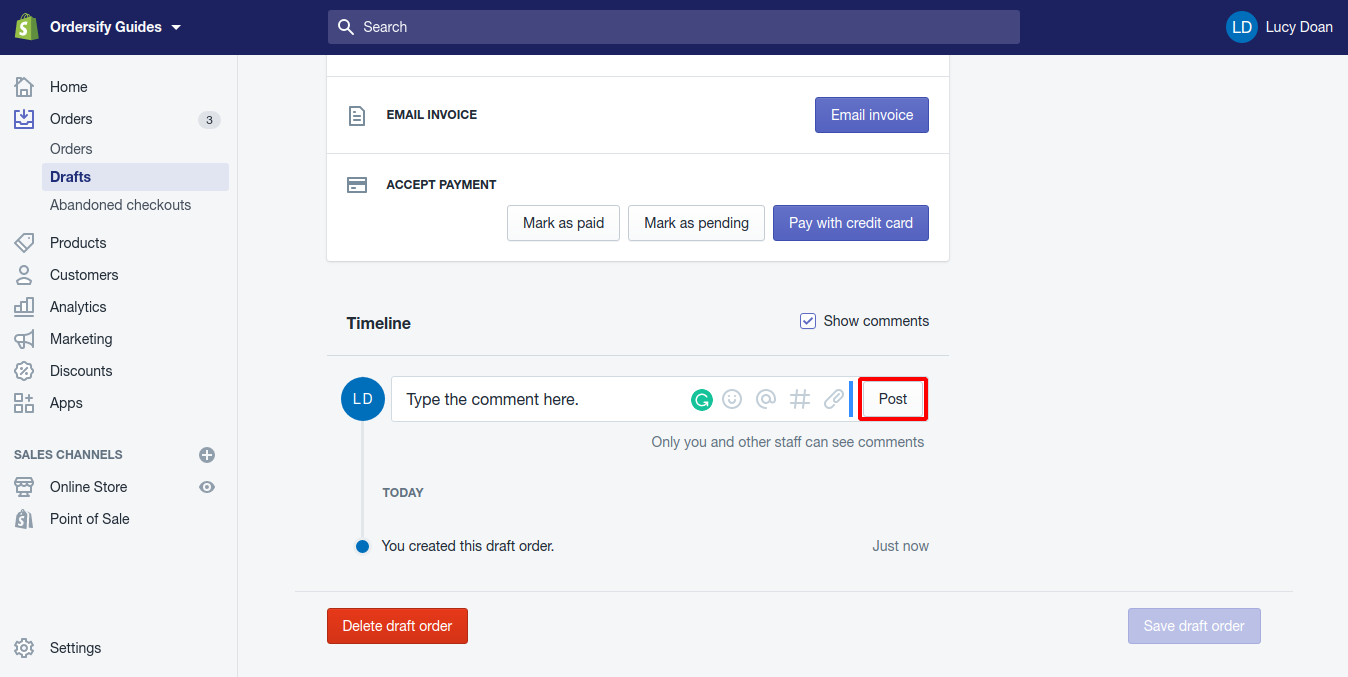
Step 3: Type the comment.
Scroll down to the bottom of the page to find the Timeline section. Tap on the ** Leave a comment** textbox, then enter the satisfied comment. Link to staff, orders, customers, or products if you want.
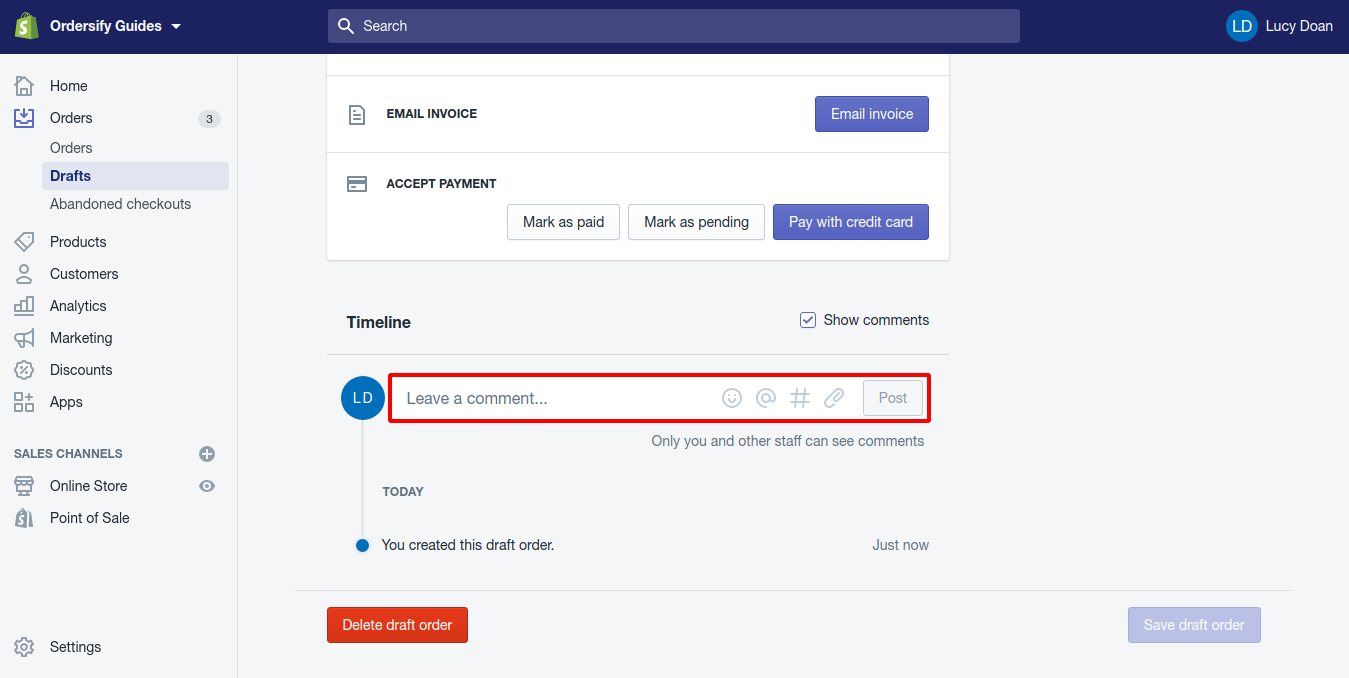
Step 4: Click Post.
Finally, press on Post to add the comments successfully.