How to send account invites on Shopify
Can be said that, sending account invites seems to be an effective way to engage your customers, you can easily start opening a channel for two-sided communication, strengthen the relationship between you and your customers and create a network of loyal customers for your store in a long run.
With Shopify, you can send an account invites to your customers in two ways, either individually or in bulk, depending on your targeted customers and your own marketing strategy.
In this article, I will show you How to send customer account individual invites on Shopify.
Before sending account invites, you need to go to the Settings section. Then, click Checkout, and choose Accounts are required.

Step 1: Go to the Customers section.
After logging in your Shopify account, choose Customers.
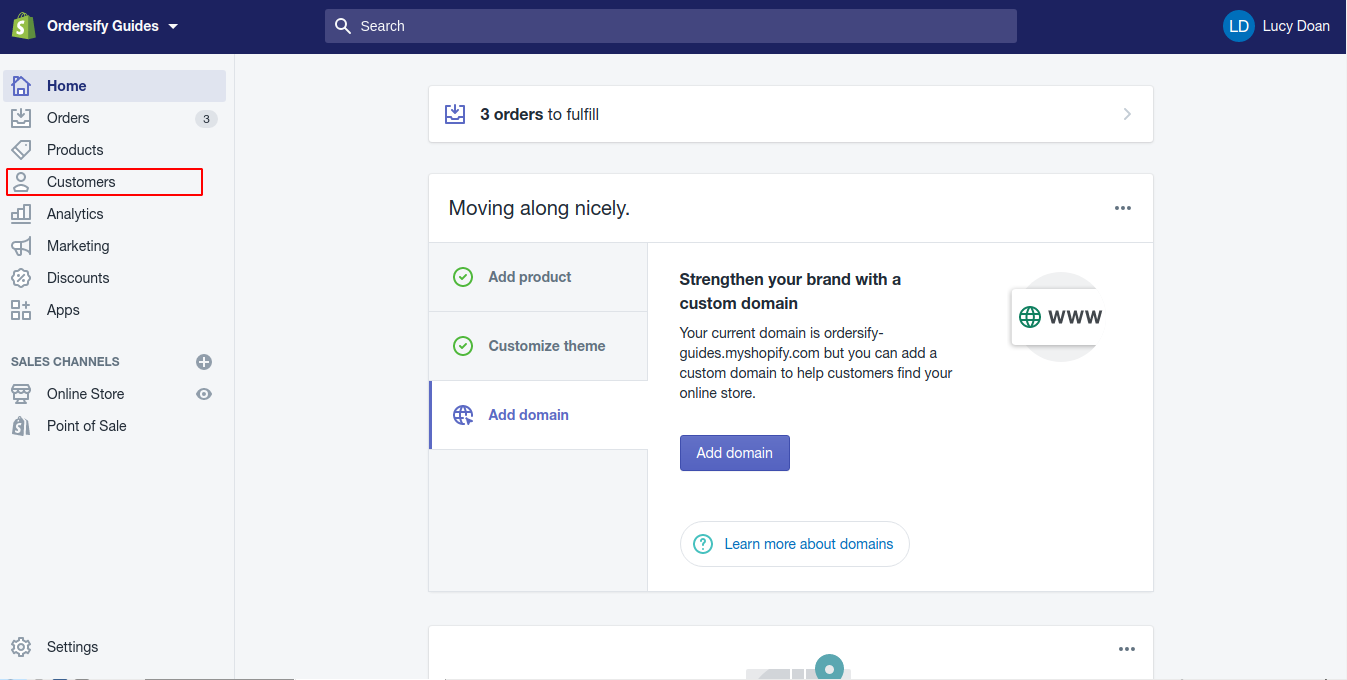
Step 2: Select your customer.
From a list of customers, click on the name of the customer that you want to invite. If the customer you’re inviting isn’t listed, then you’ll need to add them first.
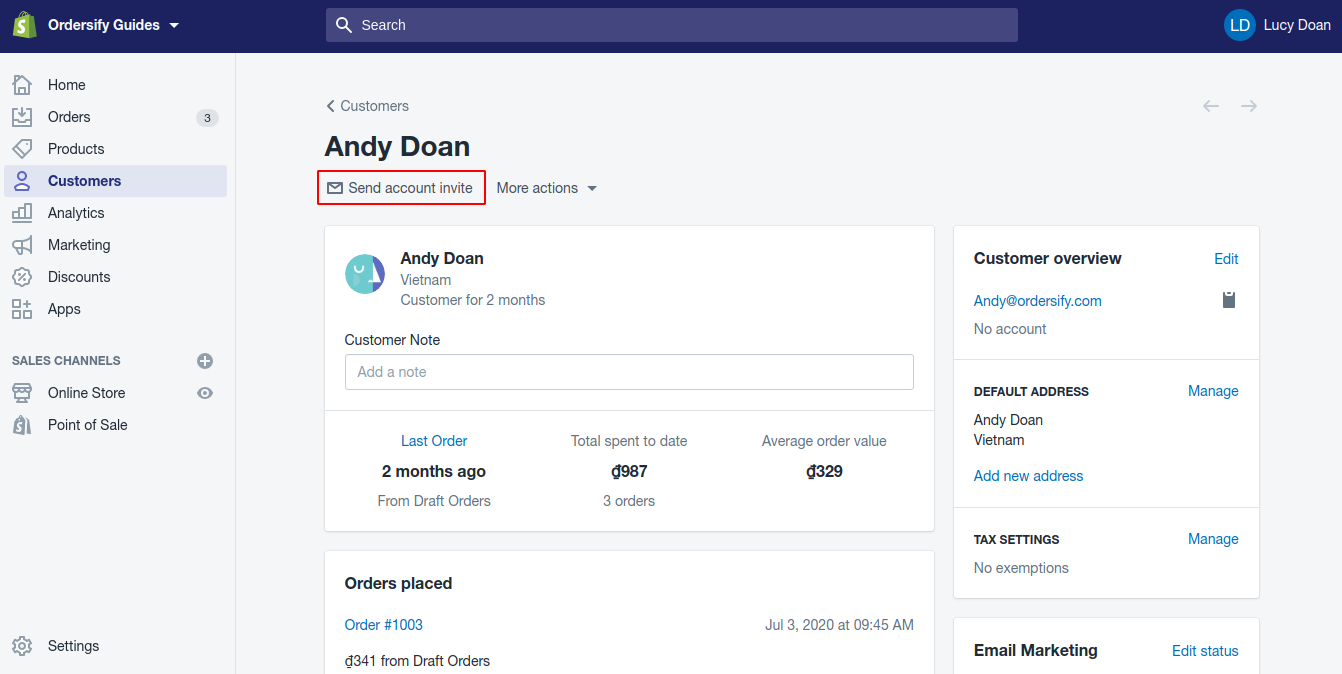
Step 3: Click Send account invite.
Click on the Send account invite button, the Send account invite window will appear. Remember that if you forget to set your customer account preferences as optional or required, the line will NOT be there for you.
Step 4: Edit account invite notification email.
you can edit some details and information in the account invite notification email, such as content, subject, sender, recipients, recipients of blind carbon copies (bcc), etc.

Shopify also provides its users a tool to draft a default account invite template, so that you can set some contents in your notification email as permanent and save time to write different individual account invites for different customers of yours.
Editing the default copy of your invitation email by clicking the Notifications link under the Custom message area.
Step 5: Review account invite notification email.
After editing your account invite notification email, you can review it by clicking Review email button at the bottom of the window. A preview of your email will be shown right after. Check your email again carefully before sending it for real.
Step 6: Send account invite.
Click Send notification to have Shopify send the account activation email.