How to add Google Analytics on Shopify.
If the questions you have about your store’s performance can’t be answered with the data available in Shopify’s analytics, then you can use Google Analytics. Google Analytics lets you track visitors, sessions, and other customer behavior on your store.
To help you to add Google Analytics , I have prepared some steps on ** How to add Google Analytics on Shopify**.
Step 1: Go to the Google Analytics by cLicking on: https://analytics.google.com/
Step 2: Choose the Google account you want to sign in with, or click Add account to sign in with a new Google account.
Step 3: Choose Website and fill in the required information. Use your primary domain for the Website URL.
Step 4: Click Get Tracking ID.
Step 5: Use the drop-down menu to select your country if it is not already selected, then click I Accept to acknowledge that you have read the terms of service.
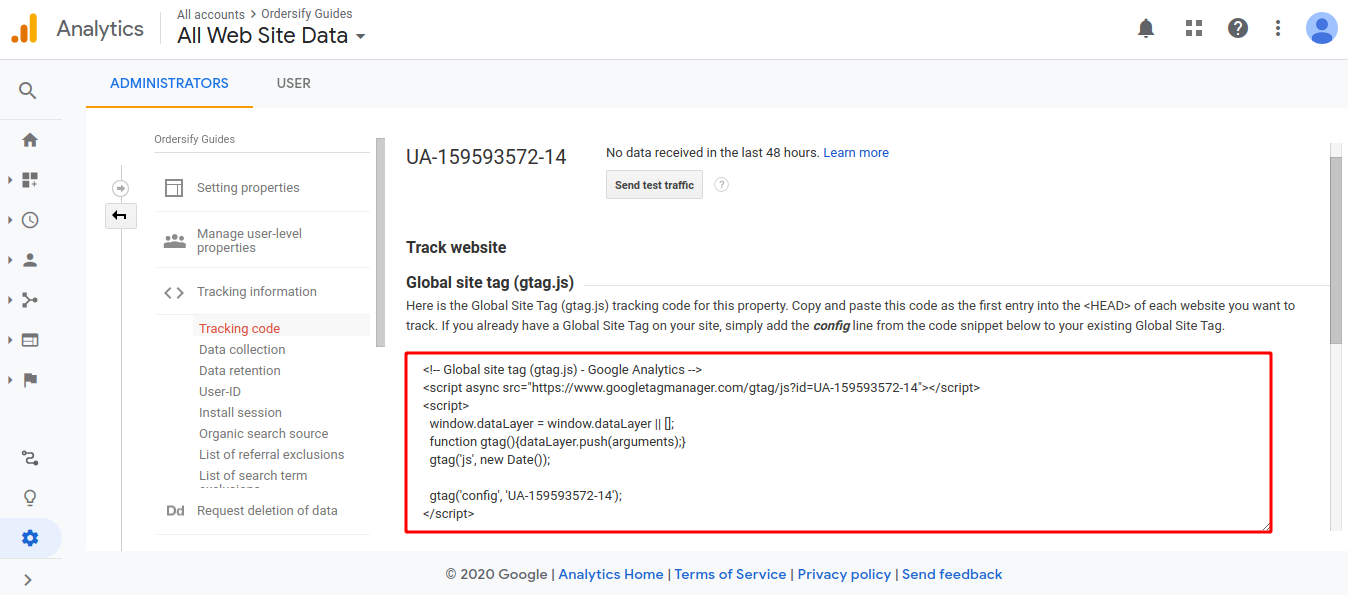
Step 6: Get the global site tag.
On the next page, you’ll see a lot of information and options. The only thing you need is the Global Site Tag. Copy the global site tag.

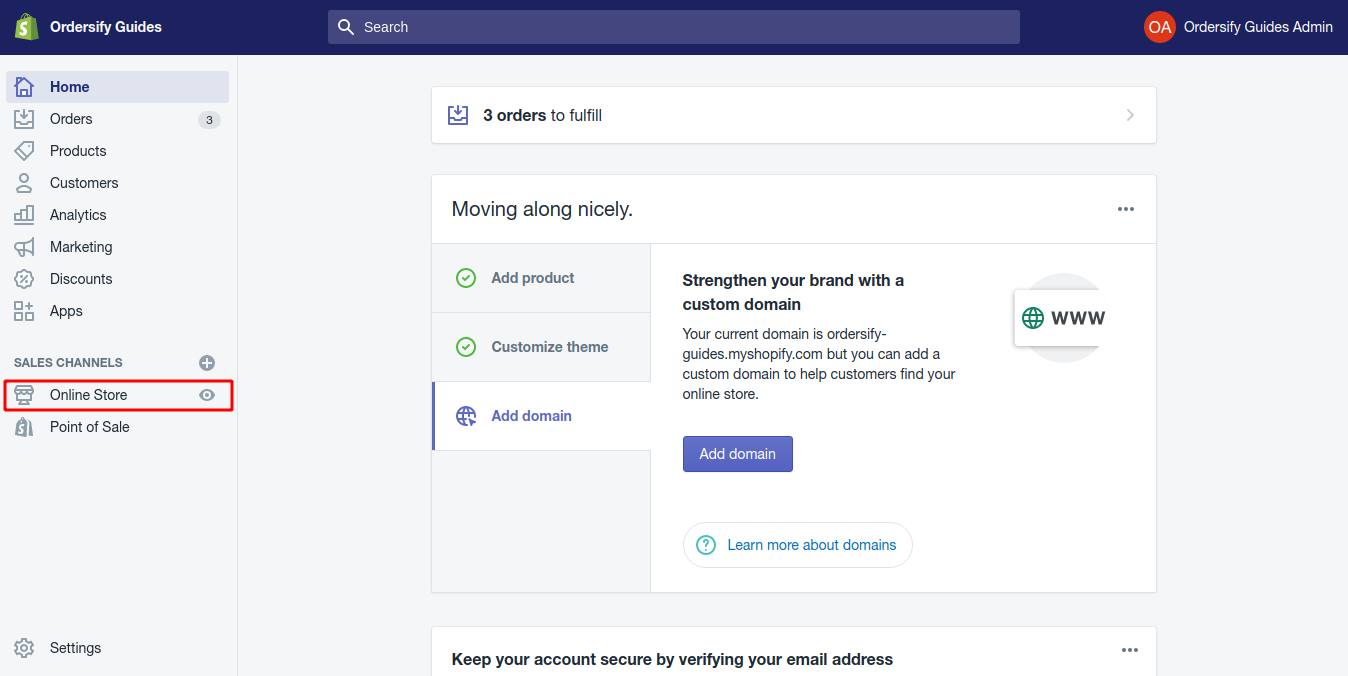
Step 7: Go to the Online store.
From your Shopify admin, choose Online store.

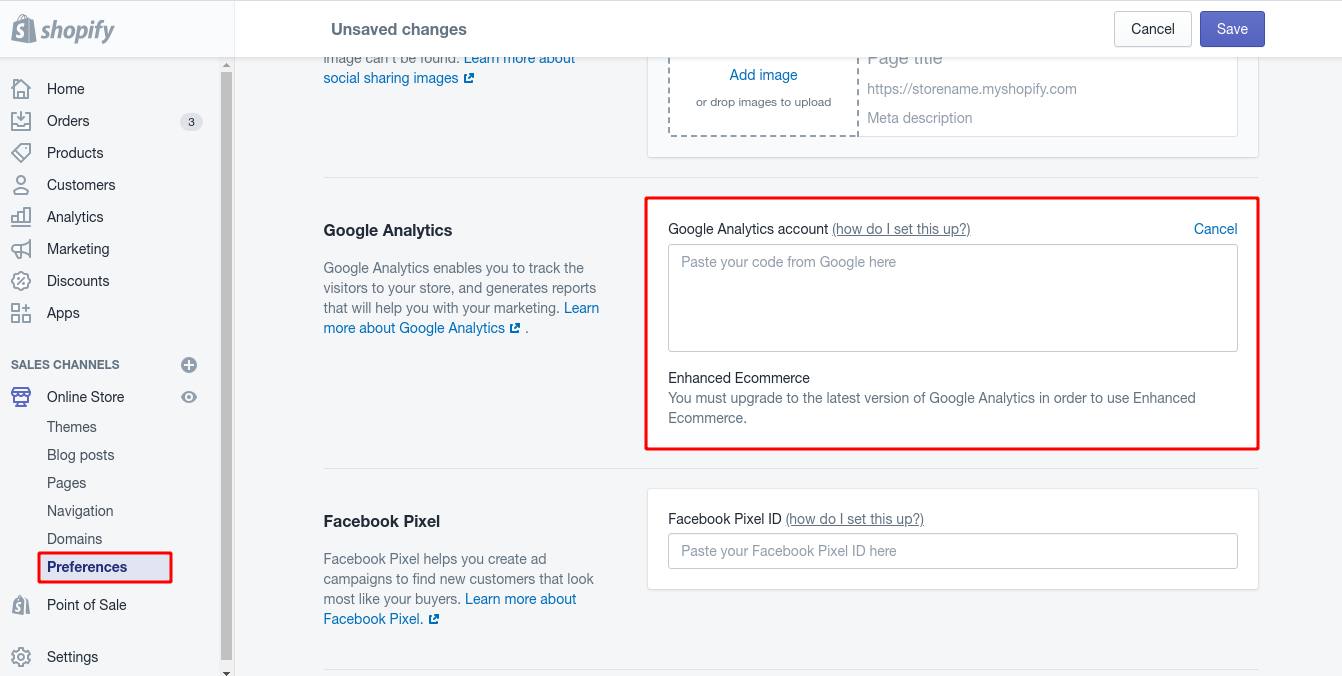
Step 8: Paste your global site tag.
After going to the Online store page, click Preferences and paste your global site tag in the Google Analytics account field

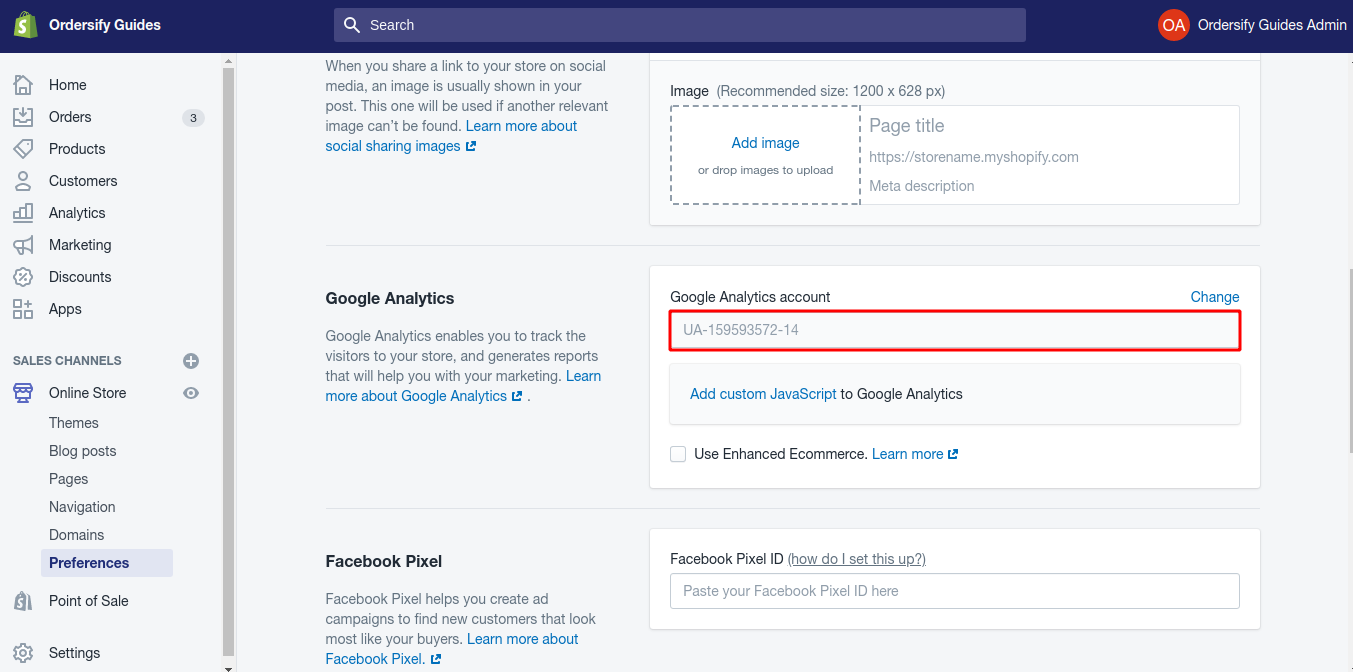
You’ll know that Google Analytics is enabled on your online store when you see a code beginning with UA- under the Google Analytics account heading, like this:


